Monday, June 3, 2013

week 16

Tonehole. This tonehole needs to be filed completely flat, so I can pad the saxophone. (The weird white thing inside is a leak light).

To check for flatness, simply put a leak light inside (and turn it on), and put a perfectly flat tonehole file on it (abrasive side up, of course). Now you can see how flat the tonehole is.

I'm using the j.l.smith tonehole files, that are pretty special. They come with a giant delrin handle.

The allen wrench is inserted into the file like so (oh, and you can't see a small delrin guide that's under the file itself). Then I have to twist it until the tonehole is flat.

It will only make the tonehole flat, you need to be very very aggressive with the files to actually do any damage to it.

 The tonehole is now flat, and needs to be de-burred. We use our solder scrapers gently and some of use use aluminum foil to polish it up too.

Just started padding. It's a giant nightmare. There's always light coming out, no matter what.

Now one of them is closer to being done (the one on the right if you can't tell). 

Just a funky shot of pads in the air. Whoo!

Doing a small tonehole now (I forgot to do one)

And now it's flat!

Oboe time!

It looks so different from the clarinet!

Those are some weird keys with holes in the middle. To get that hole you have to use cork pads (also cork pads are used on the oboe because they give a perfect vacuum).

A naked oboe!

Some weird looking oboe keys laying around while I assemble the instrument again.

My screwboard. I have to say that the oboe is fairly complicated, compared to the instruments we've been working on so far.

The lower joint of the oboe (naked).

Keys of the lower joint hanging out, waiting to be put back on.

 The oboe I had has had it's socket replaced. Just look at the colour of the plastic around the two toneholes to the right, and compare them to the one on the far left.

2nd of May was a snow day! so we didn't have school that day. I got to school at 6:30 to get some work done on my saxophone, but everything was locked. Bummer. The snow doesn't look that bad in this picture, but we had all that in just one night, and trees were breaking all over town, taking out power when falling on power lines.

week 15

 Oh no! That tonehole has a dent in it, so it's not round. Luckily Lucas has fun pliers to fix that, one half was flat and the other one was round, so it was easy to make the tonehole round again.

Ta Da! Doesn't that look round? It looks like nothing happened to it, which was my goal.

Okay, look at the base of that post, can you see the line that kind of looks like solder around the bottom part of it? The post was way off and needed to be moved. Lucas wanted to use it as a demo for the class so I let him.

This is the post on the opposite side of the one that used to be in the wrong spot, I put the hinge rod in  (I made sure the hinge rod was straight before I used to to look at the placement) and looked at how off it was. I needed to move the weird post just a bit more to make the keywork nice and smooth.

Making a new hinge rod! One of my hinge rods was very stubborn when I tried to bend it straight and got all sorts of weird things going on, so I got to make a new one. First I have to file down the end that gets the threads, to the outer size of the threads, then I cut the threads in with a die.

Next I stick the hinge rod I made into it's place, and cut it to size.

 That looks about right. I could make it flush with the post, but looking at other hinge rods on this horn made me decide to have it just a tad shorter.

Now, the most important part, cutting in the screwdriver slot. 

And at last, putting the new one in. Now, of course it needs the keys on, but I think this looks beautiful too.

While I'm on the subjects of hinge rods, this is a clarinet that I got from ebay, and the hinge rod is stuck in the key/posts. 

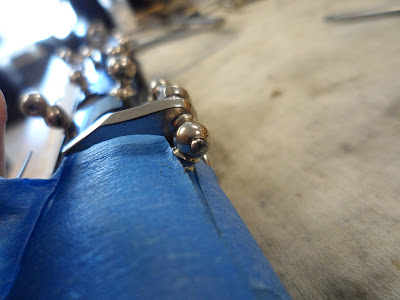
 Lucas helped me get it out. He put tape on the clarinet to protect it from scratches and told me grind down the rod, and then cut a new slot in it (because the old slot was all messed up). I eventually got it out that way and made a new hinge rod.

Doesn't that rod look perfect? It looks like it has always belonged there.

week 14

Just look at those springs. They definitely look like they want to stab you.

The brand of my project saxophone. It's a "cheap yamaha" everyone keeps telling me.

Wow, I wonder what happened there, those marks are pretty weird.

I drilled a hole into my hammer, just for fun! Doesn't it look cool?

Kidding, I really had to straighten hinge rods, and to do that, we have to spin them in our bench motor, while twisting the hammer handle and slowly moving it outwards. Basically bending the rod straight.

The sax looks kind of weird with no keys on, but the keyguard on.

And my saxophone has a bad keyguard attachment to the body that isn't soldered properly. It doesn't have much to hold on and soldering it in place is a fun small project that will take no time. I won't even burn any lacquer!

There. Now it's on. The lacquer got a bit foggy around, but with some quick light buffing that goes away.

 Just another angle.

Wow, just look at that key and the giant bur the manufacturer left on. The end of the tube has been violently hacked off, by the looks of it.

 Giant bur again, from a different angle so it's easier to see.

Wow, and there's even a huge slanted gap between the hinge tubes. I'll need to straighten it and swedge (but not too much so nothing moves out of place) to make it look good.

Another keyguard flange that wasn't on properly, I failed to take a before picture, but this one is a bit messier than the last, and I managed to burn some lacquer.

And another shot of that.

week 13

This was a flute key. I took the arm off and I'm going to make a pearl protector out of it! (for saxophone work)

I took the threaded part out too that was in the middle, where the screw goes in, so it's not sticking out.

Now, this is just a brass rod that I silver soldered to the flute key (notice that the key is now convex too)

Another angle, this looks pretty cool.

This is Ben's rod and key compared to mine (his wasn't finished and I had forgotten to take more progress pictures)

And a picture of my dirty saxophone.

What is that? It's the glue that keeps the body glued (and sealed) to the bow of the saxophone. I wonder if the tuning will change if I manage to scrape some of that out..