This is my body tenon. The front of it has a weird high spot on the top, and this high spot is rubbing against the (foot joint) socket, making horrible scratches.
This is how it looked like after some sanding. I brought it to Lucas (unsure of how much would be safe to sand), and he told me to use my solder scraper. Then he showed me how, on my project flute, and took the high spot away.
The China can be seen really easily once the flute has been disassembled. Just wanted to put in a really clear picture of it.
This is my headjoint. The thing on the tenon that is now stuck in the vice is a tool to make the tenon smaller. But you have to be really careful because making it too small is going to create more work.
This is one of my classmates, Ben. He's checking if his flute has dents, and if it's straight.
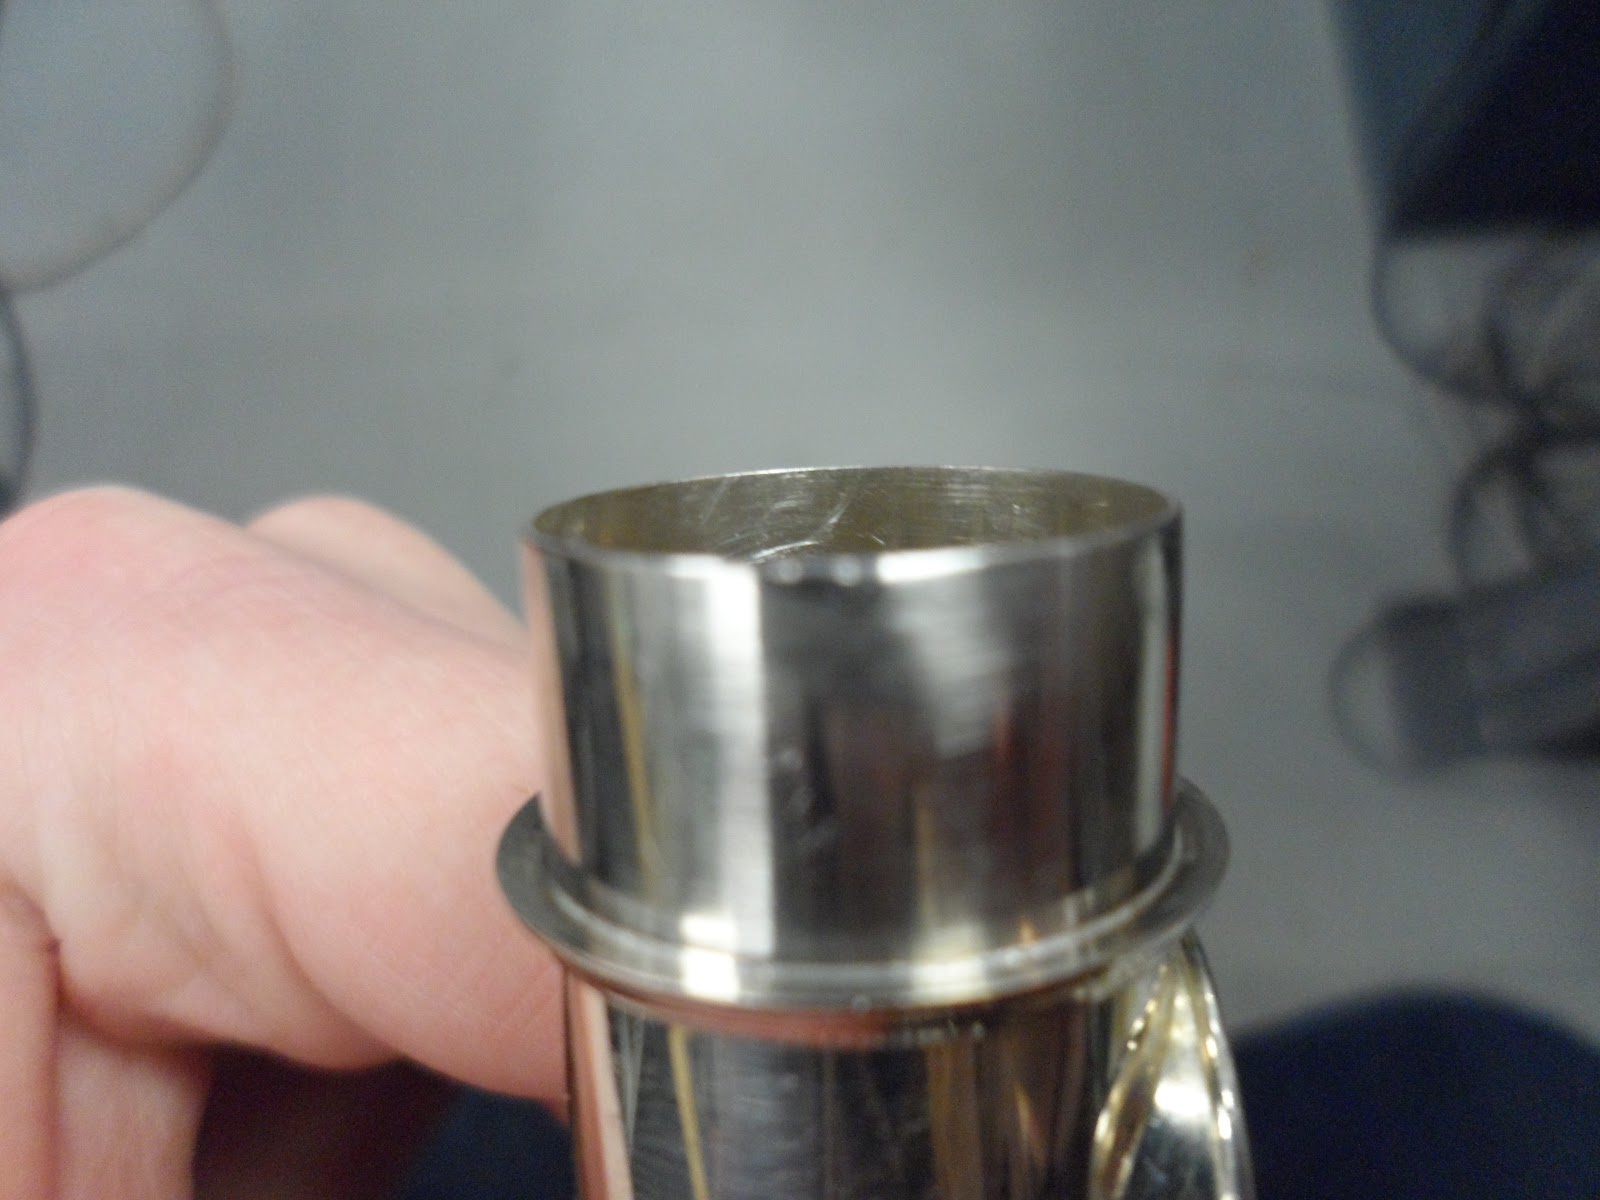
This is my head joint tenon after polishing it, now it will slide easily with even amount of pressure into the barrel of the flute.
Remember the broken post I had? This is after I tried to fix it. I clamped down the broken one (the broken one is on the left in this picture), and because the clamp was pressing down on that end, when I heated the thing up, the post on the right side decided it needed a lift. So, Lucas told me to take it off and clean it up.
The huge hole under the post that I made.
After taking the posts off and cleaning it up a bit.
I needed to take a break from the broken post because I got a bit frustrated. I sat down and fixed one pad.
My awesome draw knob clip holding my rod in place. I have to have the key on to make sure that the whole thing is aligned, and that the pad cup centers over the tone hole.
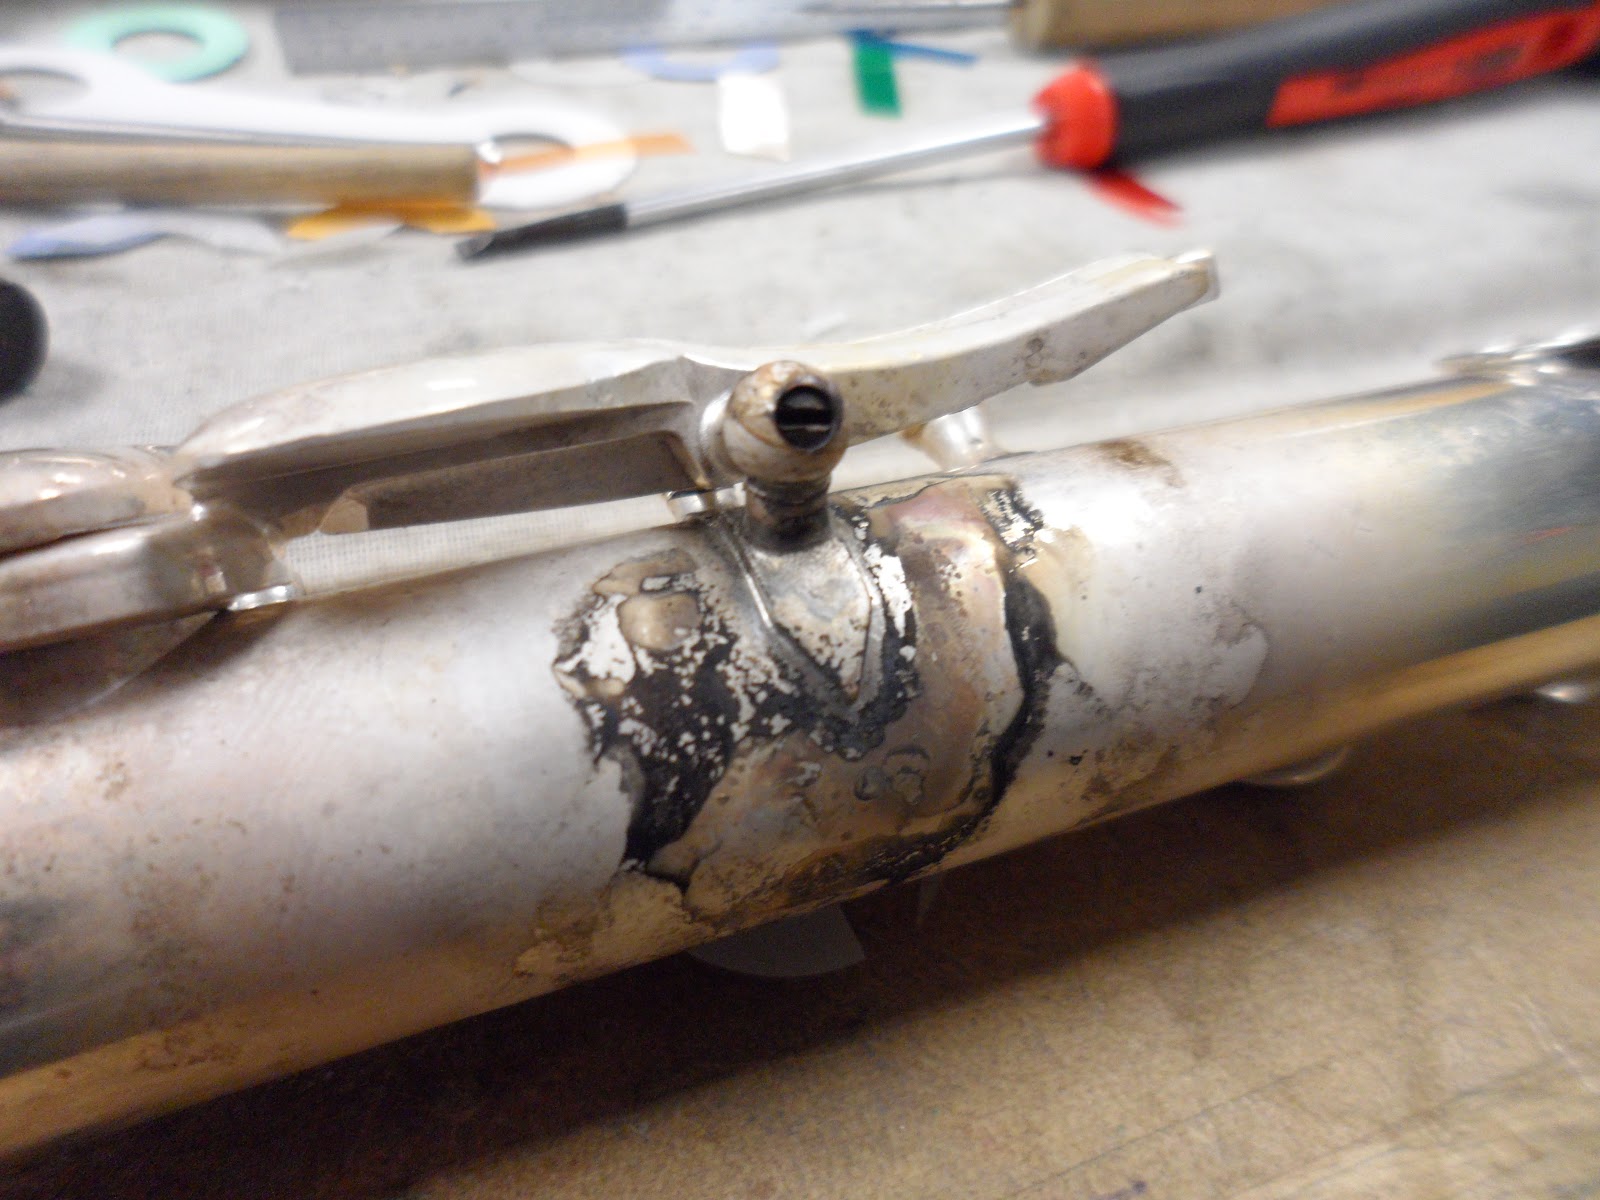
Done soldering. What an ugly mess! but the solder joint looks really good and that's what we're looking for.
Solder joint from the other side.
Now, the black stuff is just flux that I used to help the solder flow into the joint, and the white stuff is tarnish. I can clean that up with some detergent, silver dip and silver polish.
Uh oh, The hinge rod is stuck in the key. It's not stuck because the heat expanded things (I dipped the flute into the detergent to see if cooling it down would help), it's stuck because the flux actually corroded the rod. Fun. Let's put loads of that corrosion cracker in there and let it sit over night.
Since I had to wait for my hinge rod to become loose, I started doing my E. We start doing a L, and I went to silver solder that thing together. After putting heat on it forever, the silver solder melted (I think that the rod wasn't hot enough too). It wasn't enough solder so when I handed it to Lucas, he snapped it in two pieces and smiled. This is how I should check my solder joints. Guess I have to clean that up and try again, now with more flux and more patience.
It was really tough to get the hinge rod out. I had to grip it with my knipex pliers. They have protection on them, so the jaws don't make marks, but never the less I made marks and had to sand the hinge rod to take out those high spots I created for myself.
Look at that! Now it looks good.
Looking good from another angle.
It's not okay to buff plating, but I'm buffing the rods just a bit because the silver polish won't get them nice.
I buffed the edges of the rim where solder was shoving to make it nice and smooth.
This is what happens when you buff too much. See that tiny copper coloured spot on the right side of the pointy rib? It's right beside the solder? The flute is copper plated before it's silver plated, and that's the copper plating.
I remembered that my project flute had been buffed like crazy before I got it, so I found some more spots where copper was showing. Sure enough, on the top of those posts, there is a huge area where you can see the copper.


Did you use tin/silver solder to repair this flute?
ReplyDelete