This is my pad iron, and the little plastic things I use for leveling pad cups.
Those are bigger feelers. The red one being the thinnest one.
A pad getting ready to be ironed.
A pad after being ironed. Look at that smooth skin!
Whoever was handling that pad last time didn't tighten the screw up, and when I did, it wrinkled up. This would be ironed again and then a seat put in the pad, but it's just a methods flute, so I'll let it be.
See that hole? Between the pad and the tone hole? The pad is touching on the sides, but not where that hole is, that means I have to either level the pad cup by flexing it down or putting a shim under the pad.
Doesn't that look nice? My pad is sealing very well. There's just the smallest gap where I can feel that the touch is lighter but we're not going that deep.
Look at that smug face. Now it's not sealing at the top (the foot joint is upside down in this picture), and I used a marker to remember where that leak is.
This is a mailbox with a lightbulb in it. Yes, an easy-bake oven. Lucas made this one using a cheap mail-box and a lightbulb, but he also put a timer on the light bulb.
Inside the mailbox-oven we put our pads that have to be seated. We wet the pad just a little, clip it with a pad-clip and put it in the oven for 15 minutes. Then it has to sit for an hour with the clip still on, and then another hour with the clip off before I can check how the pad seals. If I wouldn't wait, I'd get false results, and I'd think it would seal great, but few hours later it would all be leaking and I wouldn't have a clue why!
My clipped foot joint.
We had to squeeze our pad-clips because they were so tight, if they close too tightly it will give us false results and ruin the seat. Jeff had those nice pliers (he said they were for pli-ing) that worked great to fix the clips.
What is this? It's an old clarinet that a guy brought in. This clarinet is from Norway and is from the ca. 1850s
The whole class rushed to the front to look at this clarinet.
The tenon is broken, how sad!
It has interesting keys, and it doesn't have posts, but pins that have been inserted into the wood.
This one got to make a smug face too, but I got my project flute before I could look at it better and shim it, so I didn't do anything but mark it.
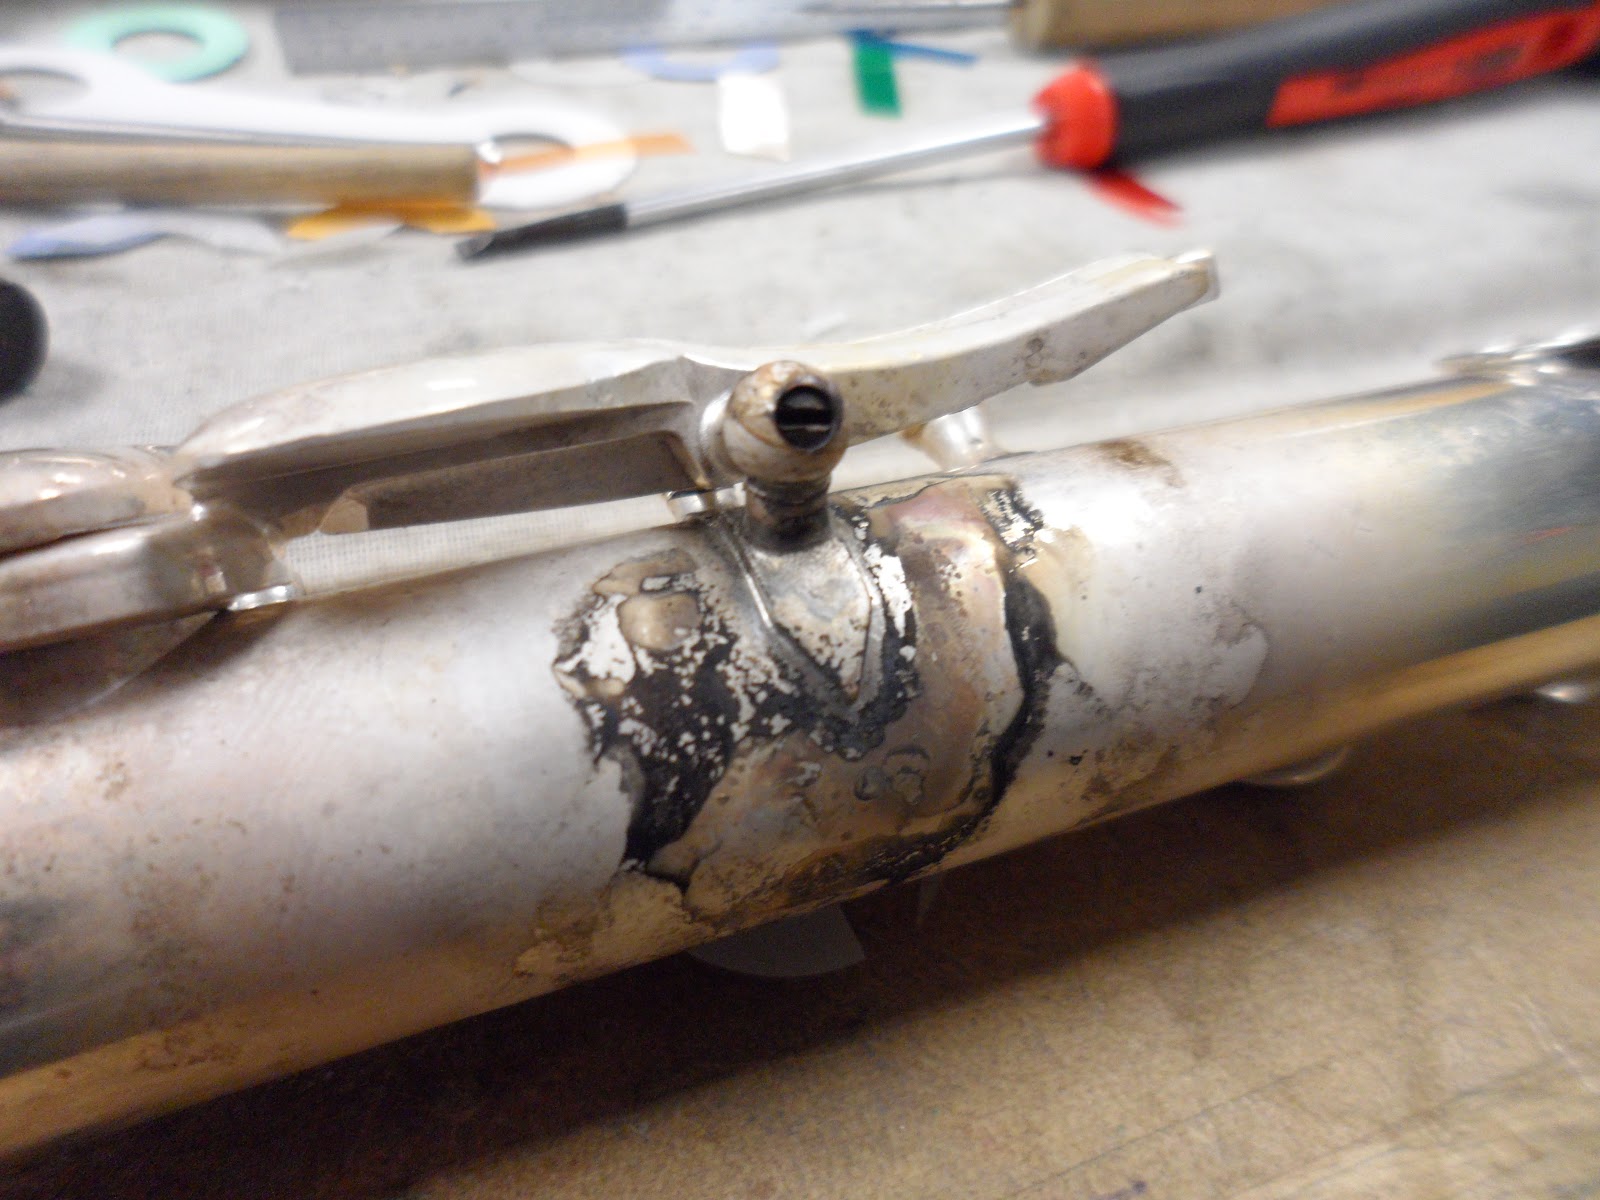
Can you spot the broken post in this picture? It's kind of between the two padcup arms.
A broken post, how fun. We're going into body work next week and I can't wait to fix it!
Look at the edge of that key, the thing that looks like marker? Yes, that's plating that someone BUFFED OFF. You're not supposed to buff plating, and that's why. The broken post probably broke when someone was buffing this flute.
The broken post again. Look closely, the black marks on the flute body is buffing compound.
Can you spot the China? Yes, this flute is made in China, the barrel says USA, but the flute body says China. It's because the parts are made in China, and then the flute is assembled in Elkhart, USA.
China again.
The flute sitting on my bench, waiting to be disassembled.
Gemenhardt. The newer Gemeinhardt are made in China, but the older ones are made in USA. They started doing this about 10 years ago.
The flute case of my project flute. I'm torn between "Why did they try to fix that with tape?" and "Where can I get purple tape like that?"
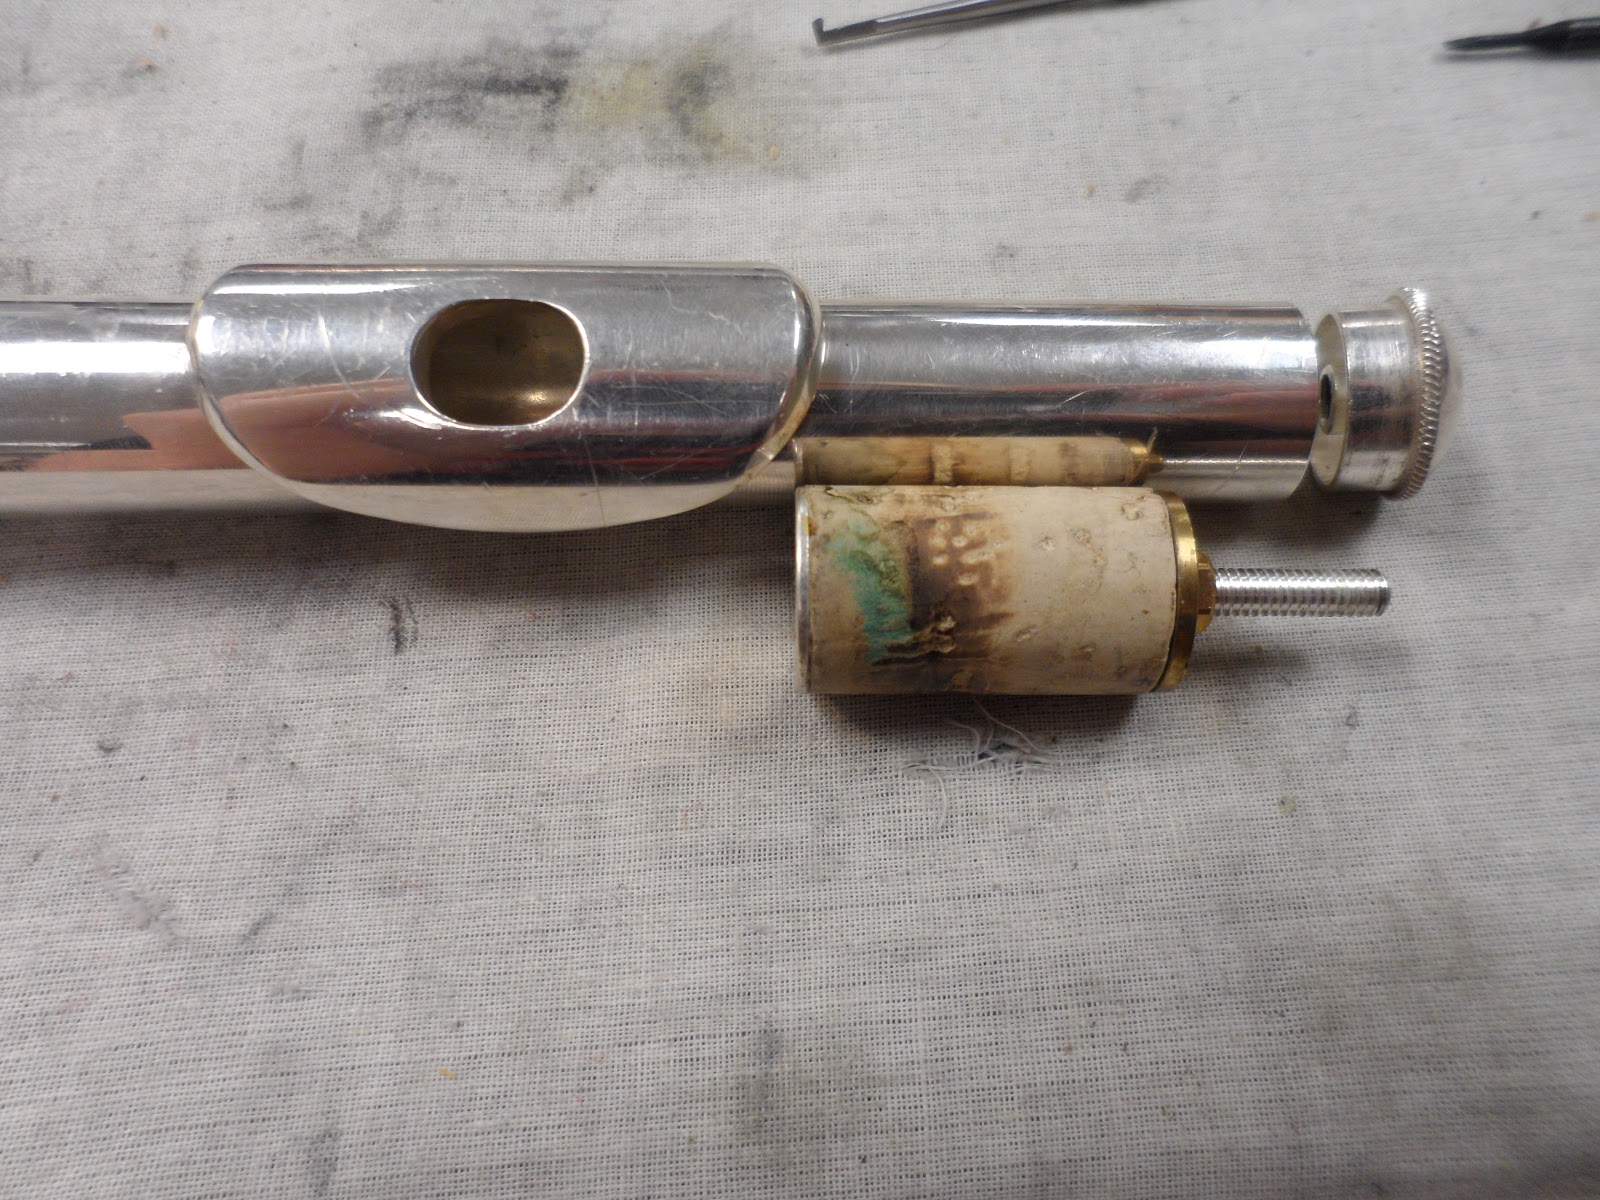
The flute and the head-cork that was inside. It's dirty and we're going to change it. It might seal okay, but I know everyone has to change the head-cork to get some practice.
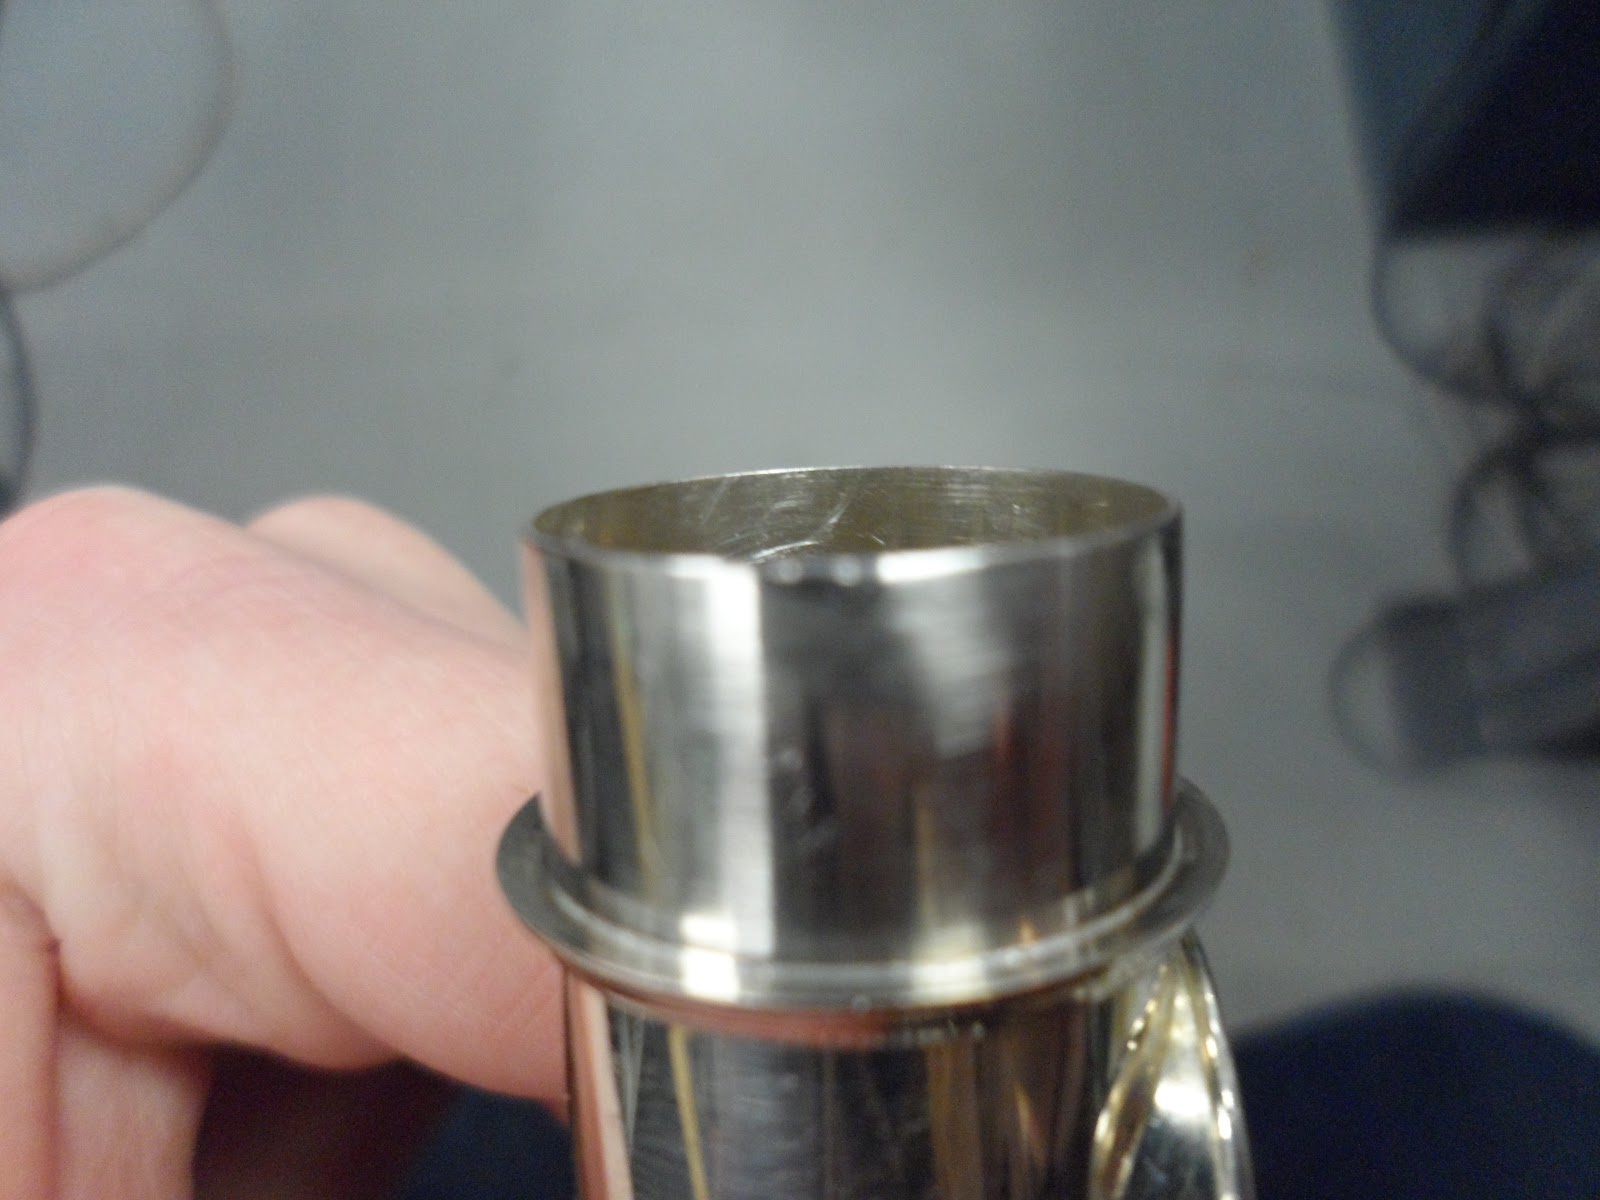
Buffing compound. In the joint. Now, the buffing compound has caused a lot of scratches inside the joint, and in time it would become loose and cause loads of trouble. Let's clean that up.
What a dirty flute!
It will go through chemical cleaning and it will look nice again soon!
My project flute, completely disassembled. "Draw me like one of your french girls"
Some of my pad washers had Chinese on them. Lucas told me that the washer material didn't really matter. He has seen newspaper, magazine paper and even pages from the Bible used!
Yuck! My trill keys and my upper stack c key were full of gross glue.We use clear hot glue (similar to what you see in glue guns) because it doesn't chip, it's easy to clean, and it works well.
Now, to completely disassemble the flute, the keys can be taken apart. This can be done with the cool device in the picture. It removes and inserts pins.
Those are the tools that you use to get the pin out, or insert it. The first one to the left is concave, it has a hole in the point. If the pin is sticking out this is the best choice. The next one is pointy, but it's not sharp. It's good for when the pin is sticking out just a little bit. The third, with the really pointy end is good when the pin is not sticking out at all. The one on the far left is good when the pin is inside the hinge tube and the pointy one doesn't have steep enough taper to reach it.
Let's take a pin out. In this picutre I'm using the concave. I was just using it to take the picture after I got it far enough to use the flat point.