Wednesday, March 20, 2013

S2 Week 7+8

This would be my project trombone.

Aw, that's a huge gap. Something is really off.

Time to saw my trombone into pieces! HA!

Oh no, I sawed the brace in half! Yeah, now I can adjust the brace better to the gooseneck of the trombone.

Cut this tube Greg said, it's brass Greg said. So I cut it, and buffed the piece. Turns out it's nickel silver. If you've ever stood buffing what you thought was brass thinking "I'm going crazy, this is brass, it's just really shiny", then you should know what I mean.

The large "ferrule" I made out of the tube, to cover the cut I made.

Doesn't that look nice? The gooseneck is not on the horn in this picture, but it's right there on my bench.

Wiring that so it doesn't move when I solder it together.

                           
 Now the gooseneck is soldered on. I may have soldered the wire to the trombone too, but it came off easily so that's not a big problem.

Oh, that looks pretty nice. It just needs some (a lot) of buffing.

Alright, so I put the rest of the trombone together, and managed to solder this stuck. Luckily I was able to heat it up quickly and gently pull it loose. Greg said this wouldn't happen if I put grease on it, which I did, but maybe I didn't put enough or some flux got in there.

Oh... That's not supposed to happen. There is a gap between the parts, this is the main tuning slide and it should go all the way in.

Whoo, fixed that. Now it goes all the way in.

Greg took a french horn apart for us. The rotor oil had some really... interesting reaction to the slide grease someone used. Luckily my friend Whitney got a recording of Greg's reaction to this reaction. He thought this goo looked really gross. 

Mm. Green slime.

 It's all over the place. Yuck! I should probably mention that I found the same goo in my horn. Yay.

French horn stringing. Isn't it pretty?

Those are the bearing plates of a french horn. They're right under the caps.

The long bar on the left is a bridge that the spatulas (keys/buttons) are mounted on. The screw that holds it down (not seen in this picture) was stuck on my horn, so that took a while to get unstuck. Hooray for penetrating oil!

Yuck. Slimy rotors from my horn. This needs to be cleaned.

Horn stringing. This string makes the rotor move, so that when the player presses the spatula (key/button) the rotor rotates.

Oh, what a nice dent in my methods horn.

And the brace that caused the dent is missing too.

Honing a tool bit. This means rubbing a tool bit on a honing block until it's perfect.

And done honing.

Saturday, March 2, 2013

S2 Week 5+6

 My goodwill trumpet, ready to be soldered. It was a bit of a pain to refit the "S" brace, but I got it pretty close, so I'm happy.

This is taken after I've soldered the receiver back, look at how nice the solder joint looks from this side.

I'm not as happy with the solder joint from this side, but Greg says that it's acceptable because of how much space there was between.

This is a knuckle dent on my goodwill trumpet. I think someone tried to take it out and didn't do a great job, but I bet I can get it better!

Boom! Got it better, and it didn't take long.

I have to put a waterkey on a customer trumpet, so Greg told me to take the parts (the saddle, and the nipple) from this crook. Done!

Putting the nipple on the customer horn. I also had to take the drawknob off so the slide wouldn't be too cluttered.

The nipple and the saddle are now on the crook, and they look pretty nice too. 

Preparing the drill for the waterkey hole. It's good to have felt on there so the slide doesn't bump into the chuck. The drill can only be extended half way through the crook, so it doesn't go all the way through, so I'm going to be pretty safe. This is exciting!

TA DA! Look at that hole. That wasn't nearly as hard as I thought it would be.

Now, adding a finger saddle on the first slide, this was easier than the nipple. Greg gave me the part and I just had to position it correctly and clip it for soldering. This is after I've soldered it.

Looks like I soldered that thing pretty well. It's a bit messy, but I'm pleased with the joint.

Shiny! This is after buffing both the finger saddle and the waterkey nipple (and saddle). I have to lacquer this to match the rest of the horn and protect the finish.

Pretty! It looks like it has always been there.

This also looks good, I'm quite happy with how that turned out.

The waterkey itself. It fits well.

Oh, just look at that. You can't tell that I added a finger saddle or a second waterkey, they look like they've always been there.

The waterkeys are not the same style, but close enough.

The finger saddle has to almost touch the casing. Greg tried to use the metric system and said that "it should be about a centimeter away from the casing". He was thinking of millimeters, because a centimeter is way too far away.

So close! It feels nice in hand too.

S2 Week 4

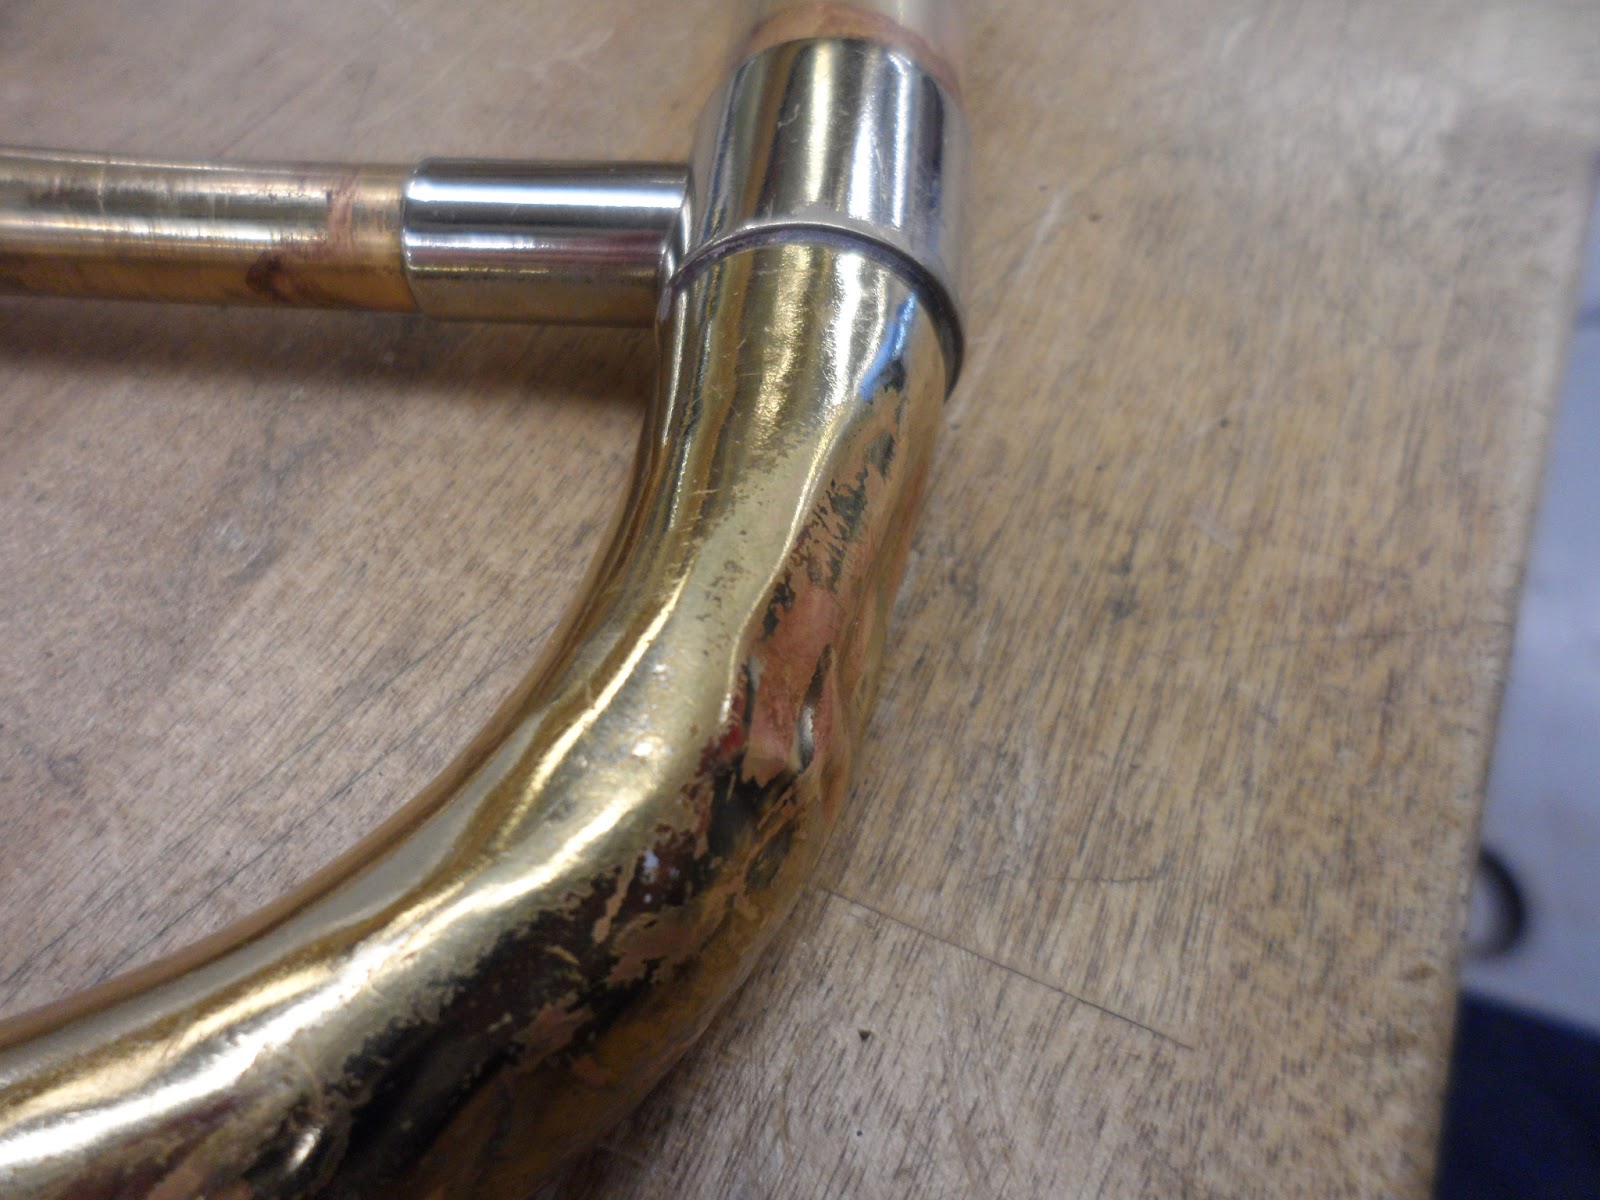
This is the main tuning slide crook on my project trombone. It's in awful shape.

Oh, you can see the seam in this picture, better be careful around that.

My trombone crook again, horrible horrible dents.

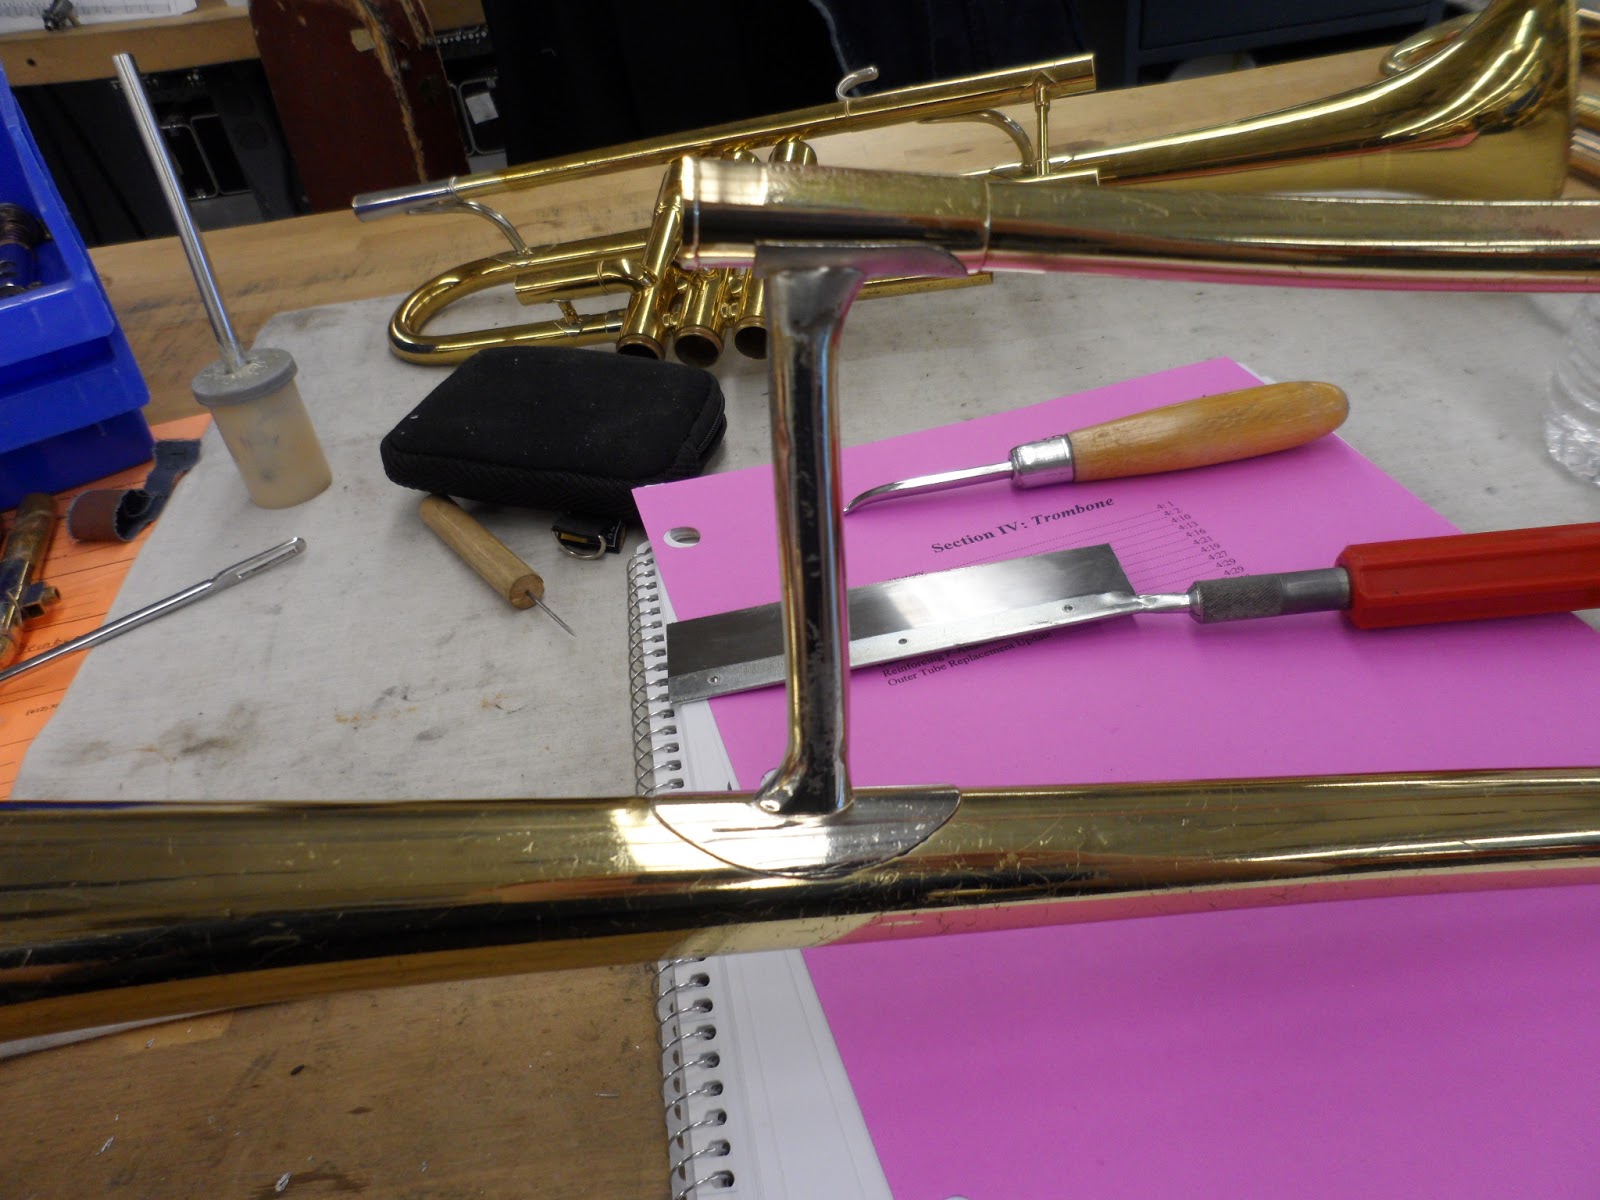
The mess on my bench. A trombone, mellophone, and two trumpets (because, who doesn't need more trumpets?)

My trombone needed to be taken apart, because the gooseneck was coming off (the gooseneck is the long curved tube at the bottom of the picture, next to the (slide lock) ring)

This one wasn't supposed to come apart (the piece to the right in this picture), but it did anyway.

After I smoothed out most of the dents in my crook I found those lovely cracks. They don't go through the brass, but Greg said I should put a patch over them.

First I have to buff the area, to prep for soldering. Look how shiny that is!

Next I made a patch, and formed it to fit (I used my burnisher for that) so it covers the area nicely.

Setting up to get ready to solder. I have to use the soft solder flux (the one in the picture) to make the solder flow in the right places, or the brass won't accept the solder and nothing happens (awkward, right?).

I decided to use an expander to hold up my tuning slide crook for soldering. I was able to angle the crook nicely so the patch would be easy to fill.

I can't take a picture of myself soldering, so this is my classmate, Jeremiah, who kindly let me take a picture of him. When soldering you have to flux the part, heat it up and try touching it with the solder (The wire in this picture) and use just the right temperature so the solder will melt when you touch it to the brass.

 My patch. It's a bit messy, but I can buff that easily.


Oh! So shiny. Greg said I shouldn't colour buff it because that would look too nice, and since the rest of the trombone looks bad... We don't want this to look too good!

This is a slide from the mellophone my friend lent me (to clean and do minor repairs on), after chemflush, but before stabilizing. 

This is after cleaning the tube with a scotch brite pad. Now it looks good.


This is the extra part of the mellophone that is used to change keys. I wonder who broke it... No, it was really crooked so I handed it to Greg who said I could flex it, and he showed me how, and in the process it fell apart. I'm not surprised really, the contact area is tiny, and this horn hasn't had proper cleaning in ages!

Oh, look at how little space those things get to stick together (look inside the lower hole, that's like a quarter of a centimeter right there).

This is a trumpet I got from goodwill. The receiver has become loose and I need to solder that back together.

Another picture of my trumpet. I look forward to fixing this!